Problem
The current hex head set up in the innovation center is problematic because they constantly fall over and are a pain to put the hex heads in the holes. I was tasked with coming up with a better and more efficient way to store the hex heads. My goal was to create a more stable and practical storage for these hex heads. I created a part in inventor and printed it out on the 3D printer.
Pre-Search
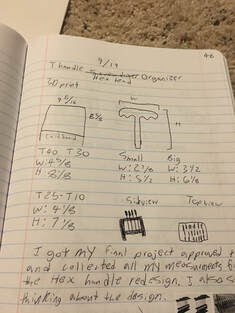
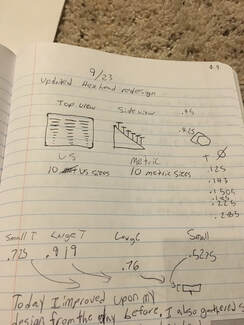
For my pre-build research I gathered all the dimensions and sizes of the hex heads. I then decided the size that I needed for the base. I thought about making the hex holder three pieces but I decided that That wouldn't be addressing the problem of stability and practicality. I almost decided to create the part in the first photo below, but then decided that it makes it more difficult to put the hex heads in the holes. I ended up making something similar the the design in the second photo below.
|
|
|
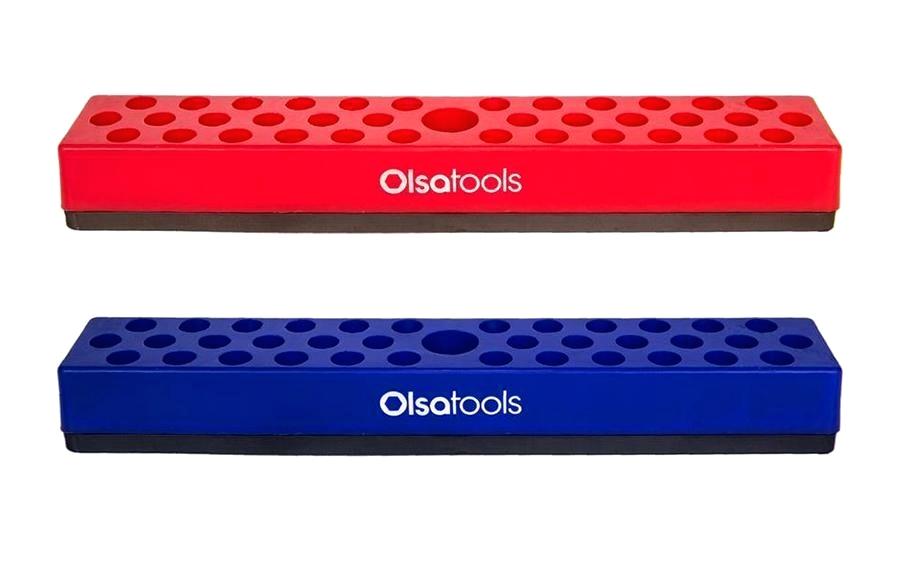
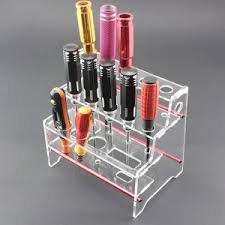
My Design was loosely based on these screwdriver holders. I liked the elevated look of the clear one but I liked the solid look of the red and blue ones. I decided to go my own directions but these real life examples gave me ideas.
|
|
Making the Part on Inventor
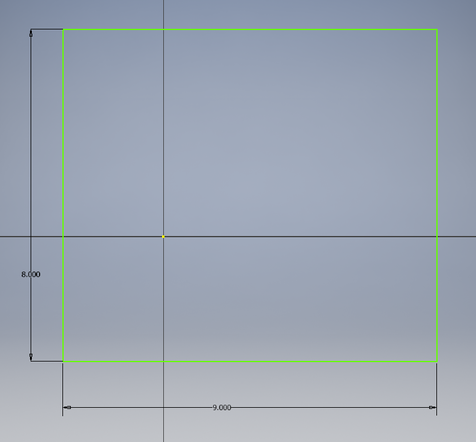
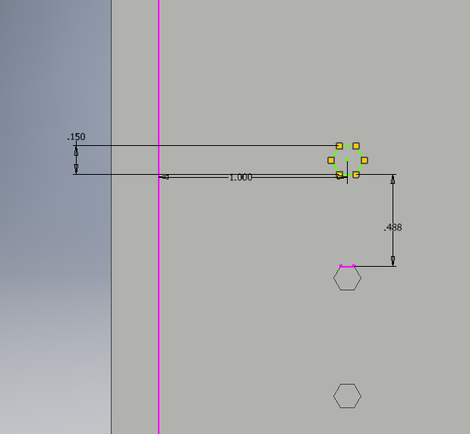
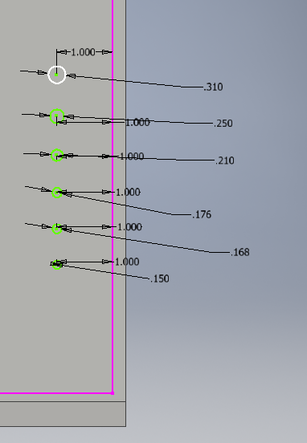
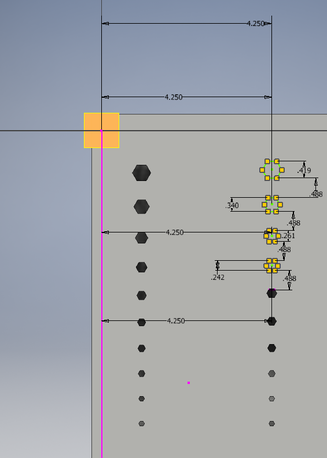
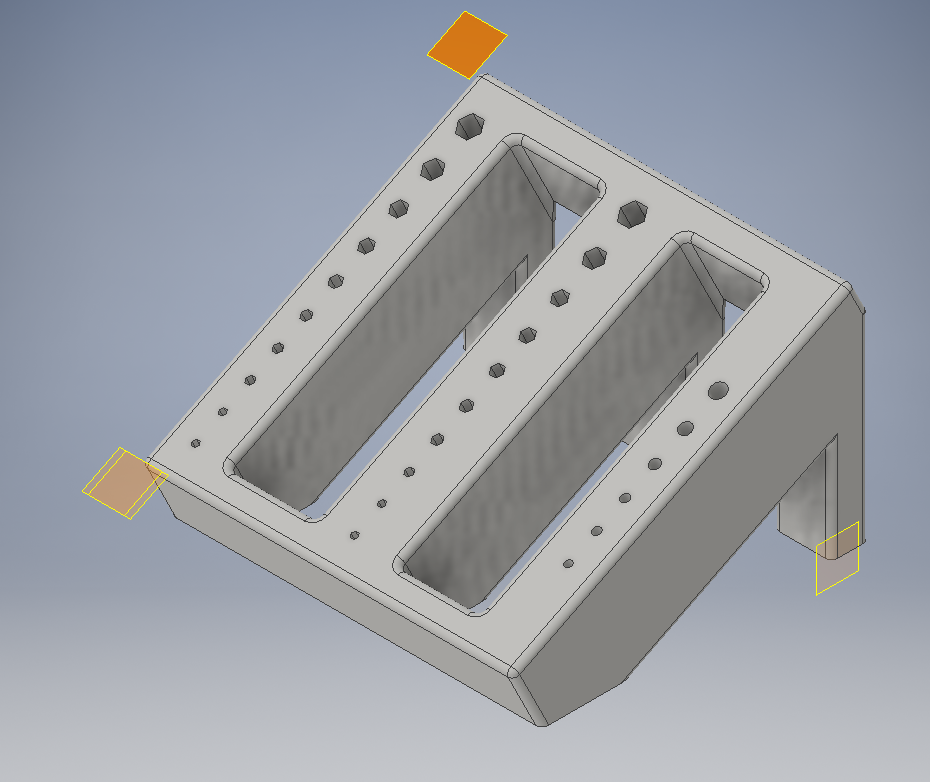
I first made an extruded 8x9 rectangle. I then made a sketch into the side of the rectangle and extruded in to make it slanted. My next step was to put enough holes in the part for all the hex heads to fit in. I worked my way up the face and when I put ten holes in a column, I started a new one. I decided to use hexagons for the holes and I put the smallest holes on the bottom of the face. I dimensioned the first hole one inch from the edge of the face. I didn't want to make the holes any smaller than 0.125 inches so I made the first two holes 0.125 in even though the actual hex head size was smaller. I dimensioned the edge of each hexagon to be 0.5 inches from each other. I extruded each hole in 2 inches (except for the first two holes). I repeated this until I had created all my holes for the hex heads.
|
|
|
|
|
Before I printed, I went back into my part and cut some empty space out in order to cut down on printing time and to help cause less warping. I cut the printing time from 55 hours down to 32 hours. I also went back and added a 3% increase to the diameter of the holes just to make sure that the hex heads fit in the holes when it is printed. These upgrades resulted in a better and more efficient final project.
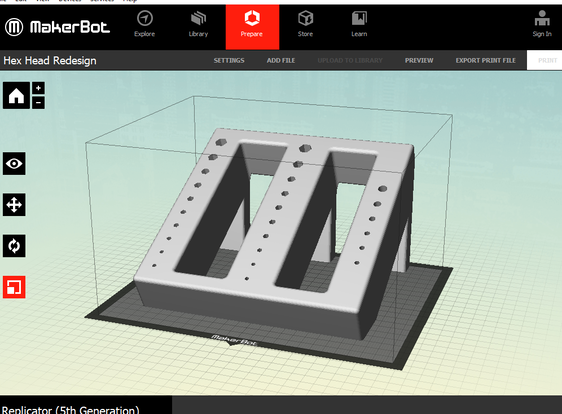
Printing
I came into contact time on thursday October 2nd to start the print, when I came to class the next day; I had ran out of filament and we had no more black. I used this as on opportunity to improve my design (Improvements stated above). I then restarted my print in a different color and found a printed final project when I came back from the weekend.

|
|
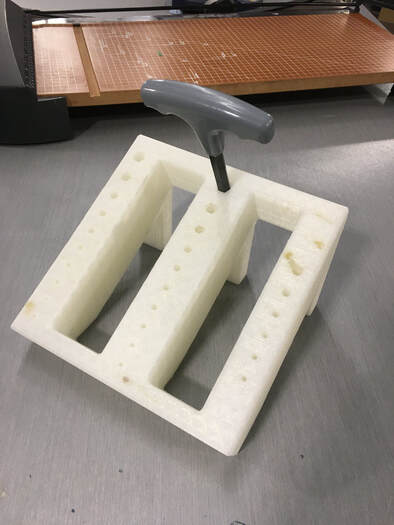
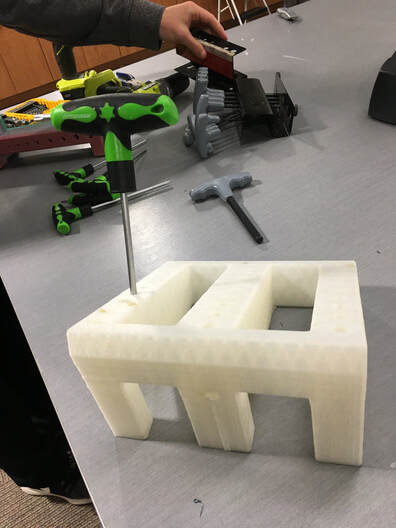
Final Product
|
|
Summary
In this project I was reminded on how to use inventor to create a part. I also relearned how to use the 3D printer because I didn't really know how to use it last year (Proctor used my print as a demonstration). I also learned how to hear about a problem and come up with a viable solution to that problem. I thought up multiple solutions to the problem but eventually settled on one that was the most practical and addressed the problem the most directly. Creating this redesign helped me to get back in the mindset and routine of being in an IDEA class.
